Before you begin
A small battery-powered signal circuit can communicate short, prearranged messages without cellular coverage. Start with visible or audible signals instead of improvised radio transmitters.
Six practical skills
Plan the message first
Agree on a short code with your group: three short flashes for “attention”, a repeated SOS (··· ––– ···) for distress, and a separate confirmation signal. Visible lights are line-of-sight only; don’t substitute them for official rescue communication.
Gather safe parts
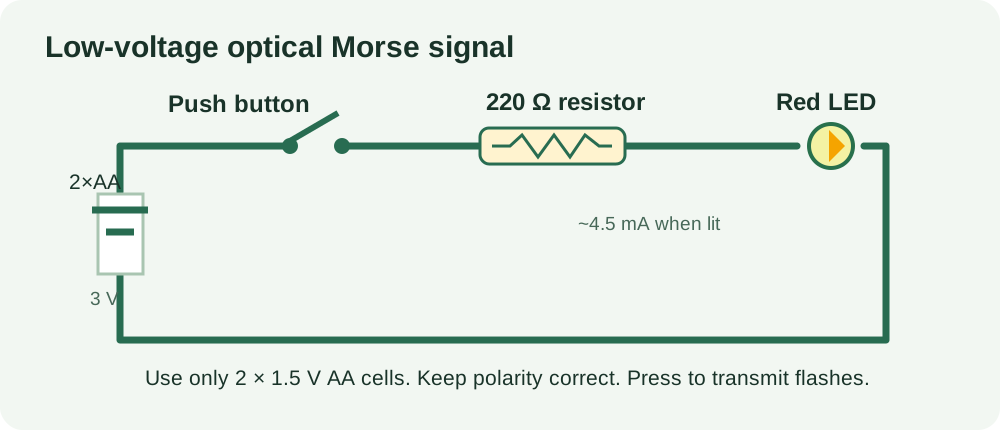
Use two 1.5 V AA cells in a holder, 220 Ω resistor (¼ W or higher), one red LED, insulated wires, a normally-open momentary switch and a small breadboard. Optionally build a separate 3 V active buzzer circuit if its voltage rating permits. Avoid mains electricity and lithium cells without protection.
Build the LED circuit
Disconnect batteries while wiring. Place the battery positive terminal → momentary switch → 220 Ω resistor → LED anode (long lead) → LED cathode (flat/short lead) → battery negative. Double-check the polarity; connect the AA cells only after checking for shorts.
Check the resistor and test
For a nominal 3 V source and about 2 V red LED forward drop, (3−2)/220 ≈ 4.5 mA. The resistor limits current and protects the LED. Press the button briefly; if it does not light, disconnect power and check wiring and polarity.
Make a matched audible version
For audible Morse use a self-oscillating active buzzer rated for 3 V instead of the LED/resistor path, following the buzzer datasheet. Keep the switch in series; many passive buzzers need a square-wave driver and will not make a tone with steady DC.
Plan a usable field system
Carry spare batteries, a waterproof case, written signal definitions, a small multimeter and preassembled replacement wires. Test in daylight, darkness and rain-safe conditions, noting distance and how you confirm the message was received.
Related guides
Reference sources
Verify local laws and manufacturer guidance before field use. Information reviewed November 2026.